Showing posts with label hearts. Show all posts

Tuesday, January 16, 2018

HEART ATTACK DAY # 2


Last week I spent may days recreating the patterns you will see through the week.

Here is one that I simply love.

It is called "SPOKEN HEARTS"
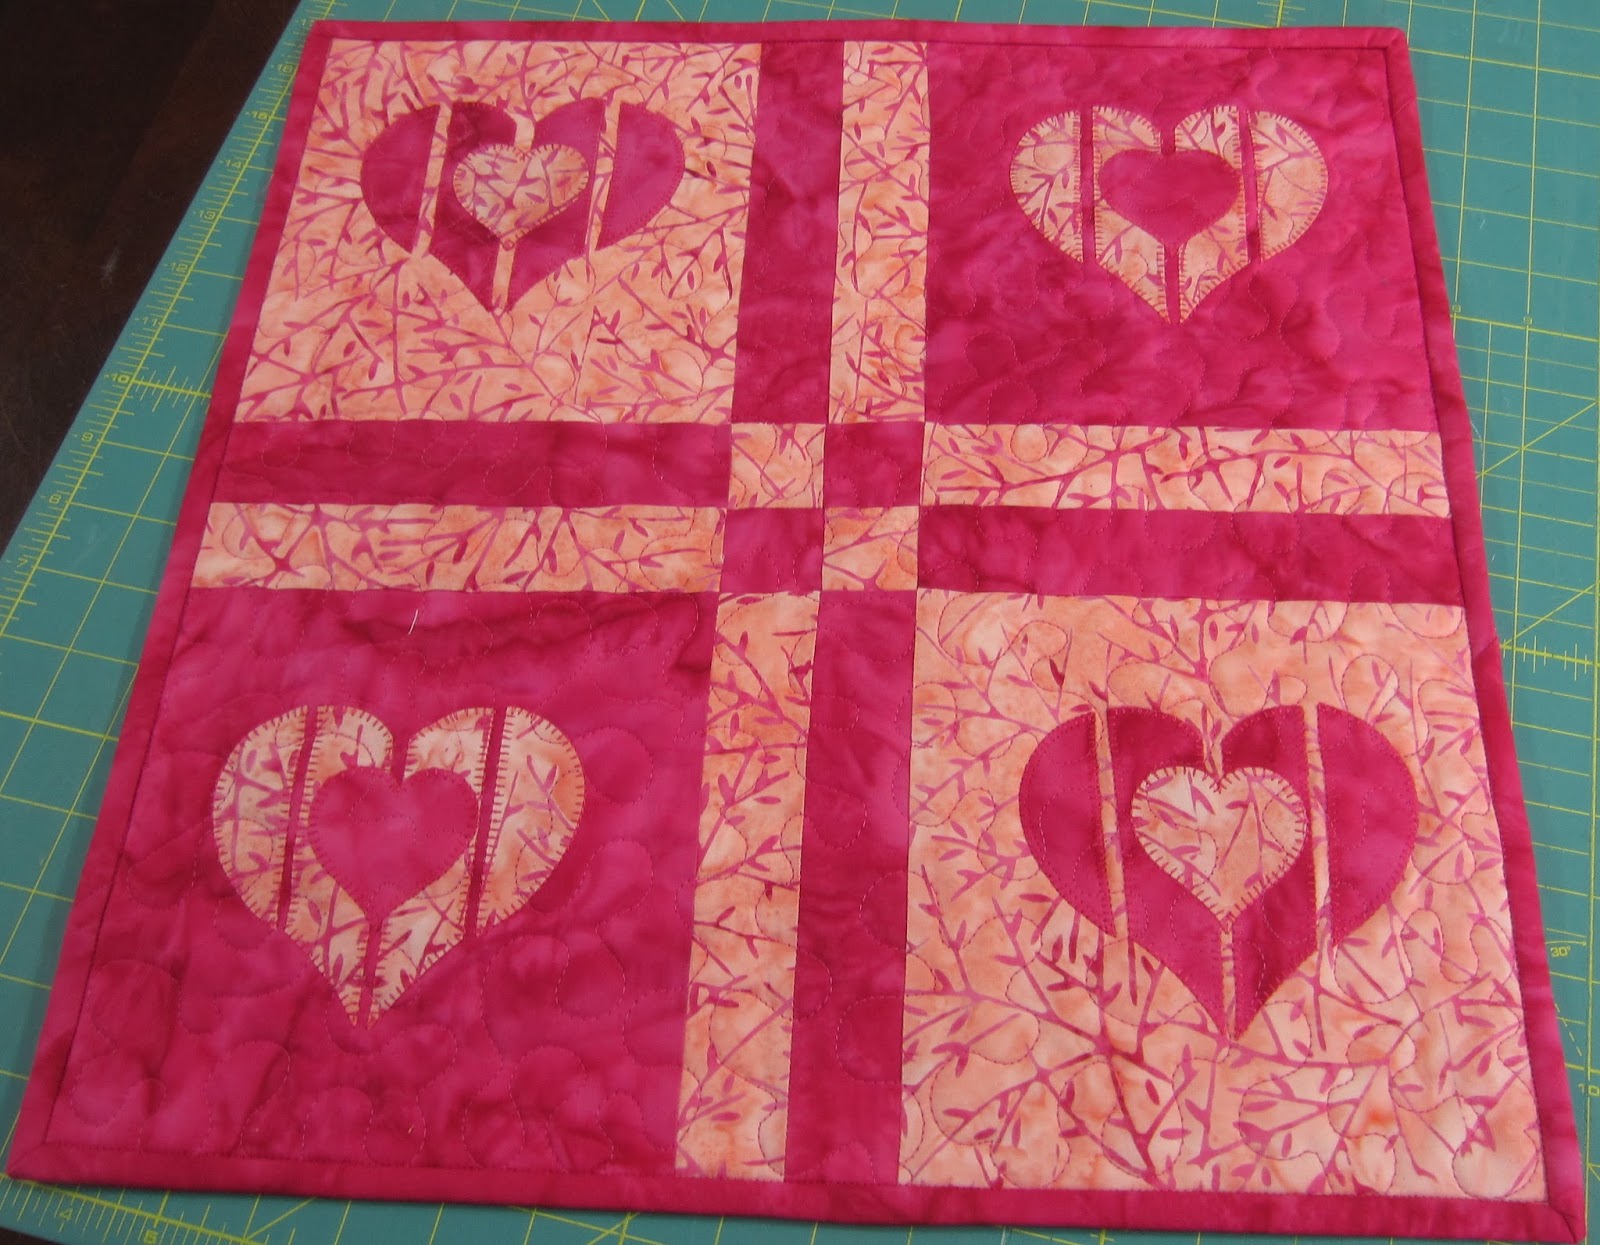


Fun little topper.  In fact you can just double up on it and make it wider if you like.

This one is 15 1/2" x 15 1/2"


Here is the original version.  You can also find this pattern on the Accuquilt site.


This is made by using the Accuquilt Go Heart die and blanket stitch.

As you can tell, it will take you no time at all to make this.  Great gift.

Just comment and one person will win this pattern.

-------------------------------------------

The winner of yesterday's pattern is:
Love love! Reminds me so much of Celtic quilting. Love the intertwined hearts.
reillyr2(at)hotmail(dot)com

Thanks to all of you who have come by so far and commented....the week has just started so stay tuned.
-----------------------------

This is what we woke up to this morning in Texas.


Monday, January 15, 2018

HEART ATTACK!!!!


I am calling this week "HEART ATTACK WEEK"

All week long I am gong to be showing patterns that can be made before February and Valentines day.


A lot of you have seen this pattern.

This pattern you can make in an afternoon.


It is 30" in diameter.    Once you have the circle down, and the hearts cut out, it is easy from here on out.

In this topper I have blanket stitched through all layers (top, batting, and backing).  Then all that is left is to quilt the empty spaces.


Be sure to check your printer.  My printer I have to have at 125% when I am copying patterns.


or wait until tomorrow to see if you have won this pattern.  Just leave a comment, one of you will be the lucky winner of this pattern.


The wonderful thing about this pattern is if you cut your larger hearts out really carefully, you can make a smaller topper at about 22" in diameter.

Then using those scraps you can make a candle mat.

Come back tomorrow for another easy simple project.
----------------------------------

Don't forget the Island Batik FOUR SEASONS BLOG HOP

here is the line up for this week

SPRING


Monday, November 4, 2013

CAN'T COMPETE WITH THE BIG DOGS!!!

I am smart enough to know that I am not a  Judi Madsen from Green Fairy Quilts, Leah Day, or any of the wonderful quilters out there but.....in my own way I wanted to share with you some of the quilting on this "Tree of Life" quilt.

 I put some religious symbols in this quilt because "The Tree of Life" is very much mentioned in the Bible.
 For those of you who are not Mormons' it is mentioned in the "Book of Mormon".

 Now...I had thought to apologize for the religious tone to this post but then I got to thinking....my religion is what makes me who I am, you whether you believe in a God or not, that is who you are and is your right.


Here is a picture of the Savior.....


 I was asked how I did this.

 I used the straight stitch on my Pfaff quilt expression 4.0.  I drew with the frixon pen on some tissue paper.  I pinned the paper where I wanted the picture and just went to town.
  Now....once I got going  I learned that I should remove the pins where I could because this only caused the tissue paper to tare in places that I didn't want.
In some places it looks like small knots, it isn't, that is just the tissue paper that I can't get out but will either wear away or wash out.  I guess I could take some tape and rub across it.

Here is the Angel Moroni, he stands on every Mormon Temple.

Some swirls...you know I love swirls
I guess you can call this feathering?
Hearts???
This is a bad picture but did some small swirls between the rays

This is one of my favorites to do as well.

The Golden question is

Do I have the quilt done yet?

I am hanging my head in shame...doing the shame walk.....

NO>>>NO>>>NO

I have procrastinated, I am bored with it, tired of it....can't pull the trigger.  All I have to do is go in my room and put the last border on and bind it..that is it....that has been it for a week now.

I did go and do extra quilting in it this last week but it has sat for days after that.

Won't someone come over and keep me company while I make the last plunge in getting it done and out of my home?  Begging here!!!

Sunday, March 4, 2012

FORGETFULNESS AND LIFE'S SMALL DISAPPOINTMENTS AND TUTORIAL!

As I was searching through my pictures for my tutorial I found these hearts I failed to post.
I got the idea over at Sew Cal Gal's, I ran all over town for the valentine M & M's...couldn't find any. These were for a church Dance.
Now for life's small disappointments. I made this trash can for the Moda Challenge and well...it didn't quite make it. What I realized is they were looking for simplicity. Maybe I have a little too much trashy taste in me?

Sometimes (I am sure I am not the only one) that we spend more time dusting ourselves off to get back on the horse than we do actually riding the horse. My poor knees are almost thread bare.

Congrats to those that made honorable mention and the four that made it into the contest.

This reminds me of the song "I like my women a little on the trashy side"...ha!!! Maybe my taste is a little on the trashy side????

Oh well...for those of you wanting to know how I made this trash can (which I love having in my sewing room).

Here goes

I took my ugly gray trash can, took my batting and made a template out of the batting as you see here:
I cut it to size, May I suggest that you cut it about an inch bigger on each side for it kinda shrinks some when sewing. Here is my template.
Backing - (I did not use my most expensive because no one will see it). Made the backing a little larger than the batting.
Then I got my honey bun and started sewing strips. The first strip is face up with the next face down (right sides together). Sew 1/4 inch.... Then you just repeat the step, sew another strip face down (right sides together) on top of the next strip.
This is what you will see. I just fingered pressed. Maybe I should have gone to the iron each time?
Keep sewing all the way down your template. My trash can was smaller at the bottom so I adjusted the stitches so they would taper as I sewed down the strip, so my strips were wider at the top and smaller at the bottom to accommodate this difference. It doesn't look this way in this picture but I figured this problem out as I went along.
This is what you will get.....I wrapped the piece around my basket and trimmed the excess.
Then I did a binding as you would a quilt.
Got my trusty glue gun and glued this to my basket.
I chose from the remaining strips pieces about six inches long or there about, scrunched them up and glued them to the back of the buckle like so.
Then I glued it to the trash can.
Well, this certainly frees up some of my March. March has already gotten away from me but now I will find the time to do those things I am committed to do and hopefully, free up some more of my time to do those things I want to do.

Nichole will chose a winner for the Buttercup Basket giveaway, if you missed it, just return to home and look a few post down (yes, I am too lazy to link it for you, no shame here)...oh...you say I am grumpy???
Well...I just drowned my sorrows in a bowl of Cheeros and bananas....oh yess......no shame here. There was no chocolate to be had in this house, trust me, I looked!!!

Hope you all had a wonderful week-end, will announce the winner tomorrow sometime.