
 I had my husband scan a pattern for you but I can not open it. If you would like a pattern, I will be happy to email it to you. My day went so fast trying to figure out this pattern....it was mid morning when I started and the next thing I knew my husband was coming through the door.
You will place the mitt pattern on the fold as well as the pocket, both pieces are the same but as you will note the pocket is just shorter.
Here is a picture of what the pocket looks like after cutting on fold (the mitt will look the same but bigger) You will want four of each, the mitt and pockets.  Then you will fold the pocket in half....this is actually what the pattern of the pocket would look like before putting on the fold.
 Put a pocket on each end...be sure they are centered correctly or you will have a lopsided pocket (don't ask me how I know......hummmm)
 Then I like to use the hair bobs (pony tail holders) for the loop to hang it on.
Then I sandwich the mit by putting insul brite on the bottom, then the two mitts right sides together with the pockets and hair bob in the middle. You want to leave an opening between one side of the pockets, from pocket to pocket so you can turn it. Be sure to backstitch at the pockets.
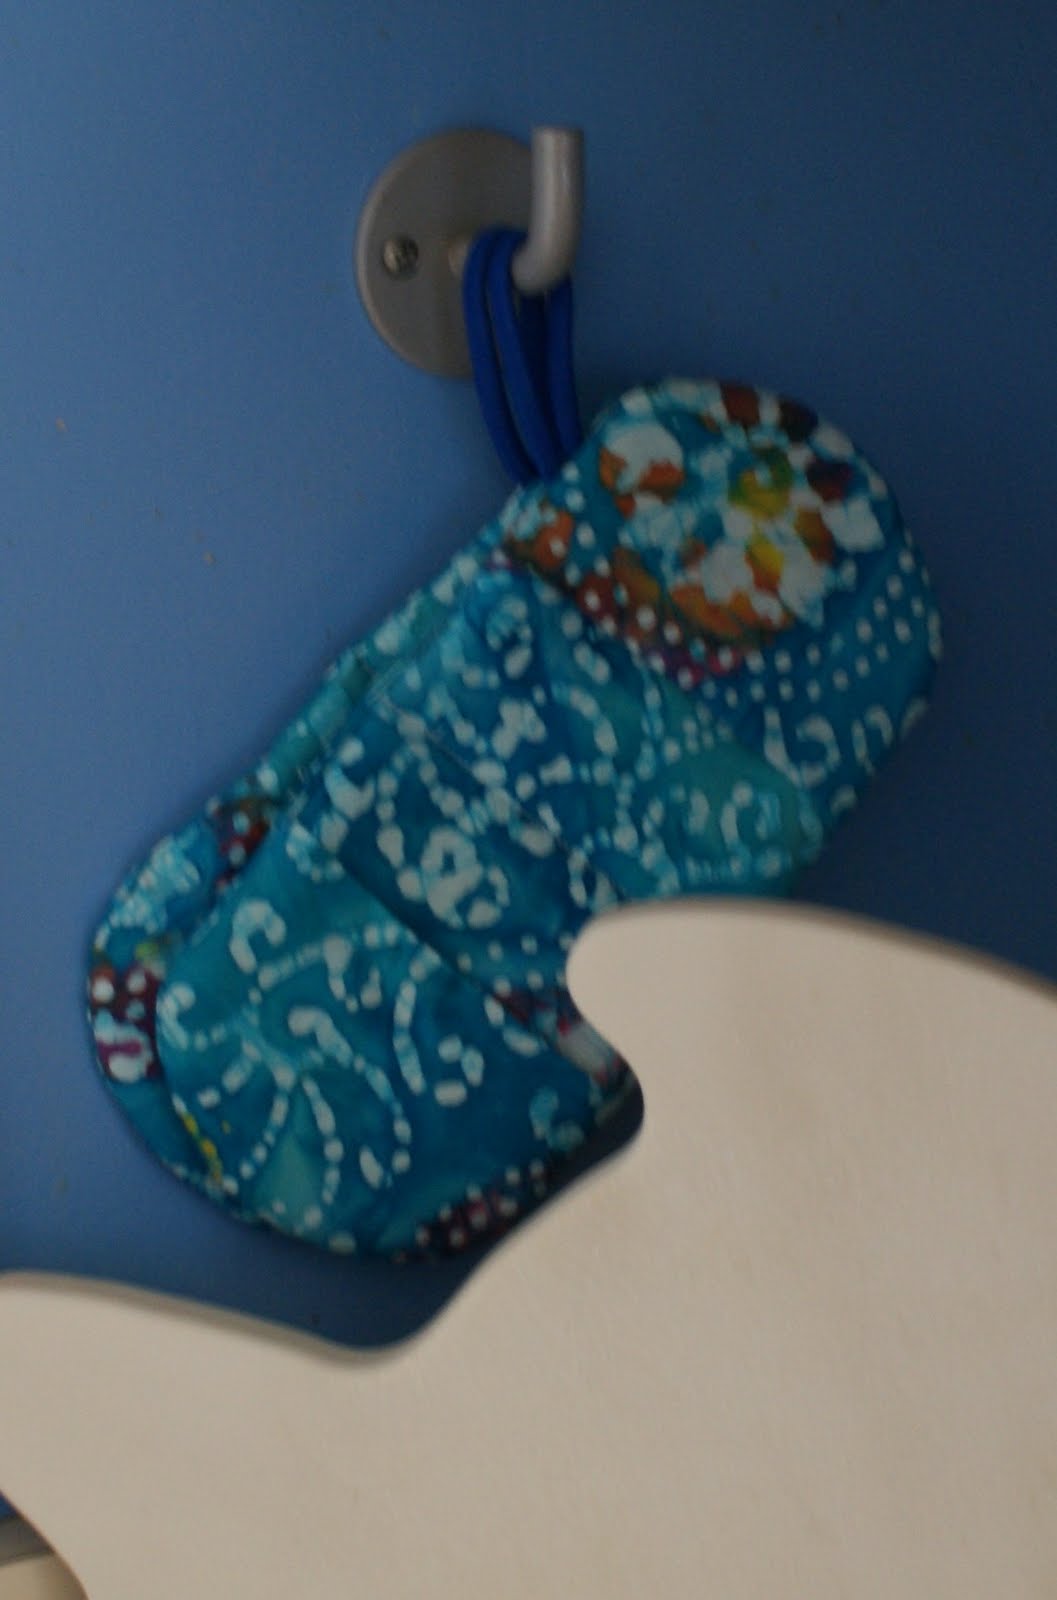
 Here it is looking nicely hanging on the hook!
 So this is what is left of a fat quarter, probably enough to make a loop if you want to use the fabric instead of the hair bobs. You will see later that I shortened my pattern so you will now have more scraps to get your loops from if that is what you want.
  So...I decided to make another one but this time with longer pockets and I didn't like where the loop was so I put it in the middle.
I also forgot to tell you to sew about a 2 inch line right in the middle between the pockets. I love the deep pockets but I still don't like the loop in the middle...and I decided to shorten the mitts and sooooooo
 Here are my final measurements: I went and took a picture of the pattern after my husband left for work today so you would have a better understanding...if you still want a pattern, just email me.

Mitt
5" wide
2 1/2 inches in length
draw an arc at the top - from the bottom of the fold line to the top of the arc it is 4 inches.
The pocket is the same but 1/2 inch shorter than the mitt (you may want to shorten them for a bigger side hole to pull the mitt rightside out. I will confess that I like the deeper pocket but it is really hard to pull this mitt through).
I love it!!! I also put the hair bob across the pocket but in this case it is across the back but you can flip it over. This way it is not in the way, for some reason it was bothering me flopping to the top or side. I like this much better. No flopping or distraction......

So I made three more....these are fast and fun (after getting the pattern the way I wanted).... Thinking about making potholders to match and maybe a towel. The sky is the limit.
I close the hole with a blind stitch....you can sew it shut on the machine. I did this on the first one but didn't like the looks of it.


26 comments:
Your oven mitts are cute. They remind me of the little mitts you put on babies so they don't scratch themselves. I'm drooling over the batik fabric you used. Those are spectacular colors.
That looks like a great idea. Those other oven mitt patterns are always way too big for my hands!
It would look very cute.
I am still a little confused but I am going to give this pattern a try over the weekend. Thanks for posting!
Those are so cute and I love the fabrics you used.
Barb, I have made some similar to this with my serger. I think that pattern takes an extra piece of fabric but it is really quick and easy.
cute -
i like them
OH Gosh! Love it. And I will draw one tonight, it will go perfect with a kitchen remodel gift I am making. Thanks for doing all the work, now I can go home and sew it up.
Cute mitts Barb!!
Crispy
Thanks for the tutorial. Love the mitt.
cute!
These are all so cute. I love your fabrics. You did a great job showing us how it is done. What great hostess gifts they will make. Thanks for sharing.
What a great idea! You are so creative!
Cute!Make for fun gifts with some 'ugly towels'..hahaha! I have a TUT similar for round ones on my blog.
We go through some pot holders with DH's cooking habits!;-)
Very cute. These would make fun little gifts. I'll have to give it a try. Thanks for doing this.
What cute little mitts! And what a great idea too! I'll have to make some of these! :0)
Those are very cute! And they seem simple. (I made some similar for Christmas gifts but they were not so easy! I'll have to give these a try for me!
I think you went oven-mitt happy. Thank you for the pattern and how-to. Nice to use and to make as gifts.
Great job! I love quick and easy projects.
Great idea Barb...some mitts are too big and cumbersome..
Thank you Julia ♥
Oh, love them. I am going to have to add a set to my "May for Me" list of things to make.
One of the best barb...send pdf. so many great colours to choose from too! I love this.
Love these. Please send pattern
Lyn, I would love to send the pattern but you are a no reply.....
!Hola es precioso! ¡Me puedes enviar el patron? mi correo es un_pastelito@hotmail.com un abrazo
They are really cute - lots of decorating possibilities too. My youngest has requested a pair for her play kitchen - gotta watch those plastic plates when they come out of the wooden microwave! Thanks for the tutorial.
Post a Comment