Showing posts with label Heat N Bond. Show all posts

Thursday, November 2, 2017

REINDEER TEA TOWELS

I had to be somewhere last night at seven.  It was six thirty so I had a few minutes to draw the patterns on my Heat N Bond fusible.

This morning I got up at five and ironed them to their fabrics.  This is actually 6 projects, 3 reindeer and  3 penguins.


We are expecting our grandson today...whoooohoo so I decided to get going on these.


I timed myself when I blanket stitched.  Talk about nerve racking, seeing the seconds go by.  I finally told myself not to look.


The time did not show up but it took me 13 minutes and 35 seconds to blanket stitch around these reindeer.  See how fast this goes?


The most time consuming part is drawing out the pattern pieces on adhesive and cutting out.  Even then it didn't take that long.

I find that is is much easier to make 3 than one...maybe a little more time but once you have the fabrics picked out you are GONE!!!

The pattern is "The Wooden Bear Quilt Designs" and the fabrics are Island Batiks.

I love these reindeer on brown don'w know why but I do.

Wednesday, June 21, 2017

HAVE THIS PATRIOTIC RUNNER CUT AND READY BEFORE THE NIGHT IS OVER USING YOUR ACCUQUILT GO!

This runner is so easy you can make this in one afternoon or evening after work.


Here is what you will need.

Accuquilt Go Rick Rack Die #55056
Star Die #55028
Strip Die 2 1/2" # 55017
Frixon pin
Fabric adhesive of choice - Heat N Bond was used here.
(always follow the directions on your fabric adhesive of choice)
Island Batik Fabrics were used on this runner

Background fabric (white) 12"x 36"
Red fabric for rickrack 11-1/2" x 21"
Blue fabric for stars 6" x 14"
1" strip 24" long (cut in half)
Binding - 2 1/2 strips 2 1/2" by width of fabric


  •  Cut out your background fabric 12" x 36".  Section off the runner 7 1/2" from each end. 
  •  Draw a line.  I don't know if you can see the grid I have drawn here?  Might have to zoom in
  • So you have sectioned off both ends 7 1'2" from the ends.  then draw a line down the middle of the middle section (6" should be the center)
  • Next draw 2" line on both sides of the middle line.
  • Then draw 2" from those lines.  You should have five lines for the rickrack.


Prepare both red and blue fabric by ironing your fabric adhesive of choice to the wrong side of fabric.
.Using your Accuquilt Go cutter, cut the rick rick out of the red.  
 Next cut your Stars out.
                         Place your rick rack down each line you have drawn.  Iron down.    
Next place your 1" strips 12 inches long across the raw edge ends of the rick rack (covering the raw edges)
Place your stars and iron down ( large star in the middle with the smaller ones to the side and up a little).
------------------------------------------------------------------------------------
You can either sandwich your runner (top, batting, backing) pin and then blanket stitch around all of the raw edges ( your quilting will be done at this point)  or you can blanket stitch the raw edges and then sandwich  and quilt as desired.
Binding and you are done.  All ready for Independence day!!       

Hope you enjoy this!                   


Friday, December 11, 2015

NO SEW SNOWFLAKE TUTORIAL USING THE ACCUQUILT GO CUTTER


                                                               Snowflake ornament


MATERIALS NEEDED:

  1. Accuquilt Go Die #55043  Holiday Medley
  2. Heat N Bond Ultra firm
  3. Assorted Christmas fabrics 5" squares
  4. 5" square of  card stock paper ( I used the end of the roll in my Christmas wrapping paper..it is no longer a tube, it is just heavy paper in a roll which works out great for projects)
  5. Ribbon
  6. Hole punch

INSTRUCTIONS:

  • As you see here, this is just a scrap of fabric that is about the size needed but you will need either a 10" x 5" strip or two 5" squares of fabric the same for your heat n bond.
  • Iron your heat n bond ultra firm onto the back of your fabrics as shown here


  •  Then place your 5" square of card stock in between the squares.  This card stock gives it the strength you need to have a nice firm ornament not a flymsy one.


  •  fold over and iron


  • Take to your trusty Accuquilt Go Cutter and cut out the shape you desire because you can even do the Christmas Tree.
  • Use a hole punch to punch in a hole for the ribbon.                                                                                                     
Tie your ribbon in and there you have a super fast, fun ornament!


Friday, November 7, 2014

THE REST OF THE STORY.....WHAT HAPPENED TO OUR STEAM A SEAM???

If you have been with me since the beginning of my blog, you would have known that I used Steam a Seam like I used toilet paper, or better yet like I eat chocolate!!

You probably noticed that it disappeared out of JoAnns!  We were all going...

                                       WHAT HAPPENED TO OUR STEAM A SEAM!!!  

Just click on the sentence above in caps and it will take you to the story of what happened.  It was interesting to know but a lot of us have moved on.

I have switched to HEAT N BOND, I use the Heat N Bond lite and I love love love it.

1.   What is more important to me since I live in a small town, Walmart carries it.
2.   Also it is at an affordable price for those of us counting our pennies.
3.  It comes in a roll.  Yes, you can get Steam a Seam in a roll but at a cost and I believe you have to order it       in a roll if I am not mistaken.
4.  I also like the idea that it has a stronger paper backing than Steam a Seam, just makes it easier and it             doesn't fall off the backing like Steam a Seam does at times.

Do I dislike Steam as Seam now?  No, not at all, it is just I have moved on.  Will I use Steam a Seam, if you give me some I will but I am happy with my Heat N Bond

Lite • Value PackLite 7/8" x 15 YardsIron-on Vinyl 17in x 2 yd Pack • Gloss


Monday, March 17, 2014

WHAT I HAVE LEARNED ABOUT RAW EDGE APPLIQUE THROUGH THE YEARS - THAT WORKS FOR ME!


First of all I have joined Sew Cal in her Christmas Challenge, to make something for Christmas each month as gifts.  Notice my side button...it will take you there for the rules if you want to join.

 I purchased (don't know how many) of these towels at JoAnn's when they were on sale.  I believe I have posted some I had completed.  Well....here are my penguins of the day.  I used one of the plaid towels for the scarf.

Here is what I have learned during the course of my Raw Edge Applique learning.

1.  Of course, I use a blanket stitch.

2.  For one, I used to tie my loose threads.  In my horror I had given a quilt to someone and when they held it up I noticed that the stitches were coming out.  How embarrassing is that?
So..........now I take about eight to ten straight stitches before I begin my blanket stitch and then when I come to the blanket stitches at the end of my stitching I take eight to ten more stitches (trying to make them tiny).  This seems to work.

3.  I have found that using a mechanical pencil to trace my patterns onto the paper back of my fusible works the best for me.

4.  Always follow the instructions for your Fusible of choice.

5.  Sometimes using glue is just as good.  My favorite glue is Elmers Glue Sticks, I have tried about five other kinds and have found that Elmers is what works best for me.  Also, you may have a few tiny puckers using glue so if the project means a lot to you, I would stick with the fusible.

6.  I have also found that it is easier to do a continuous stitch, meaning that when I start my blanket stitch I continue on....when I come to a part that does not need to be blanket stitched I put my machine on straight stitch and just go around until I find the next spot that needs to be blanket stitched.

7.  Never be afraid to lower your stitch length when going around smaller parts, you can always return it to the regular stitch you were using when done with the small part.

8.  Try not to be too heavy footed when blanket stitching, sometimes when you go to fast you get the "V" shape especially when you go around the curves.

9.  When I first started Blanket Stitching I thought that it always had to be in black thread.  I think any color you want...there are no rules (are there?)....if so, I have probably broken all of them.

10.  To save time I have sometimes blanket stitch through the quilt sandwich. (the top, batting, and backing)

11.  If by chance you accidentally iron the piece in the wrong place, quickly pull it up.  Use a paper towel or a scrap of fabric, place over the spot and iron.  Keep ironing until you get all of the adhesive up.  It really does work (don't ask me how I know).....

12.  I you are familiar with my blog you will know that I was in love with Steam a Seam, then the Steam a Seam was becoming harder and harder to find.  That is when I switched to Heat N Bond Lite (make sure it is lite and not heavy for you appliqueing).  I love Heat N Bond and have found that is is cheaper than Steam a Seam.


Saturday, December 7, 2013

HOLIDAY HALLABOO!!!! BLOG HOP!!!! LOTS OF PRIZES AND LOTS OF CHANCES TO WIN.

The winner of this giveaway is Sallie from Sallie's Sampler,  A big thanks to Jacqulynne and all of you for commenting and coming by.


Do you ever get to that place in life where you lack inspiration?

You try ever so hard to dream big?

Want that light bulb moment?

Sometimes you are just dragging foot????


If you are feeling this way, you might want to try dropping off here:


 photo 7c2489eb-cd39-4dcb-8384-c5d5adfac28d_zps57b80a92.jpg/

Inspiration Galore!!!!

She has her own fabric Lines, you can click here to see them all
Here is her shop:

Hey, I don't know why I am showing you all of this....go there and find out yourself....

take some time..

take your shoes off,

sit a spell...


Now for the fun part....she is giving a prize away at each of the blogs, so you can win several times and then....she is having a grand prize.

 What fun is that?

Be sure to go to her blog to win the Grand Prize, the other prizes are done locally so all I want from you is to comment and tell me what inspires you.

Oh...I didn't mention what the prize was?  Well.....it is a secret, won't be revealed until I find out...it is a secret to me too....you can go to her blog and see that she has a lot of fun stuff and that she doesn't mind sharing so no worries whether it will be worth your time or not.....cos I GUARANTEE it will be.

Now for a little inspiration of my own.  I am laughing at how big the pictures are.  Blogger will not let me download pictures so I went to photo bucket.

So....I purchased about six sets of these towels last year at JoAnn's after Christmas sale.  I believe they cost me less than two bucks for both.

I think I know why they didn't sale.....BORING!!!!

 photo 086_zpsddf3d195.jpg


NOT BORING.....


 photo 090_zps8635f5ce.jpg

Just a little fun fabric, Heat N Bond and you are ready to go....pick your pattern off the fabric, cut around it, add some heat n bond...then cut it out in detail.

Add a little strip to the bottom and now you have Not boring!!!


 photo 083_zpsd5eb4e38.jpg

BORING!!!!!


 photo 087_zpsb4df70bb.jpg NOT BORING

 photo 089_zps0fcb3abc.jpg

I wouldn't say so...

 Now for this one I was going to get my go cutter and make a bow....but I got lazy.

  I know which box they are in but tooooo lazy to go digging (in process of moving)...but wouldn't it be cute with a bow on the side?

A bow a bove the ornament?  Lazy again.

This one is just a half inch strip down the side of the towel and across the bottom.  I just did a little free hand ornament...I really should add a small bow above it...still can...nothing is written in stone.

 photo 084_zpsceb685f9.jpg Remember to enter this giveaway just let me know what inspires you!!!  Jacaquelynne will send you a surprise gift and I will send you these two books to help in the inspiration process.

It just doesn't get any better than that...two packages in the mail.....who doesn't like mail?

 photo 092_zpsd1374ca8.jpg


Today Sew Cal GAl  is sharing the hop with me...and we all know she is the master of inspiration...shewee...where she gets all that info and energy to write up such awesome post are beyond me.  So hop on over there too....

Notice on my sidebar, there you will find all the other hops for the week and Lilly pad yesterday....so do come and play along!!!  I will chose a winner Sat.


THIS GIVEAWAY IS NOW CLOSED, THANKS SO MUCH FOR COMING BY!!!

Wednesday, October 9, 2013

FREE PUMPKIN CANDLE MAT OR POT HOLDER PATTERN Using your Accuquilt Go die or your own pumpkin cut out


MATERIALS:

  • 10" x 10" orange fabric for pumpkins
  • 11" x 11" background fabric
  • Heat N Bond or fabric adhesive of choice
  •   11" x 11" Insul-brite or batting. 
  • 11" x 11" backing
  • Accuquilt Go cutter and fall medley die
  • Binding fabric 2 1/2" X 46" strip

INSTRUCTIONS:

  1. Take your orange fabric and fold in half
 
2.  Fold in half again like you see here.  You have it in fourths.
3.  Place on the die as you see here with the corner fold at the top lined with the stem and leaving a little peek of the die pumpkin uncovered as you see in the right side of the fabric.
Look closely.  You do not want to cut the pumpkins out all of the way, you want to leave a little sliver showing.
 
 4.  Here you have your pumpkins.  You can draw you a pumpkin and do the same thing with scissors.
 
 5.  Center your pumpkins on your background fabric and iron on.
6.  Sandwich your candle mat by having the background fabric, batting or insul-brite, and then your backing fabric.
7.  Blanket stitch or just take a running stitch around the pumpkins.
8.. Cut your project down to 10" x 10". 
9.  Bind and you are done.


EASY  EASY!!!!  Now you have a fun pumpkin decoration.
 

Sunday, August 4, 2013

EDUCATION IN "HEAT N BOND" - THERM-O-WEB ADHESIVES

In my quest for finding another source of fabric adhesive since the JoAnn's here was sparse on the Steam A Seam

 I wrote two previous articles here and here

During which time Julia from "Heat n Bond"  had sent me the following items to try out.

  I have to admit that I have been so busy that I have not been able to try out much except for the
Heat n Bond iron on fusible which I had purchased in my quest.

I also have to say that my eyes bugged out of my head when she sent me to this website.

  You can call it ignorance,

a gal having her blinders on

whatever but I truly did not know that "Heat n Bond" had so many items that would make a quilters life so much easier.


I looked through the website with a drool rag.


So let's take a look at some of the things that were sent to me.


Three different fusibles.....for three different abilities.

 Like I had mentioned, I am mostly in for applique and what fusible is best for me and I have found that I do like the "Heat n Bond" lite for that purpose.  I have used it in several projects since first posting about it.


Fusible fleece and Sew in Fleece....wonderful for those of us who make totes


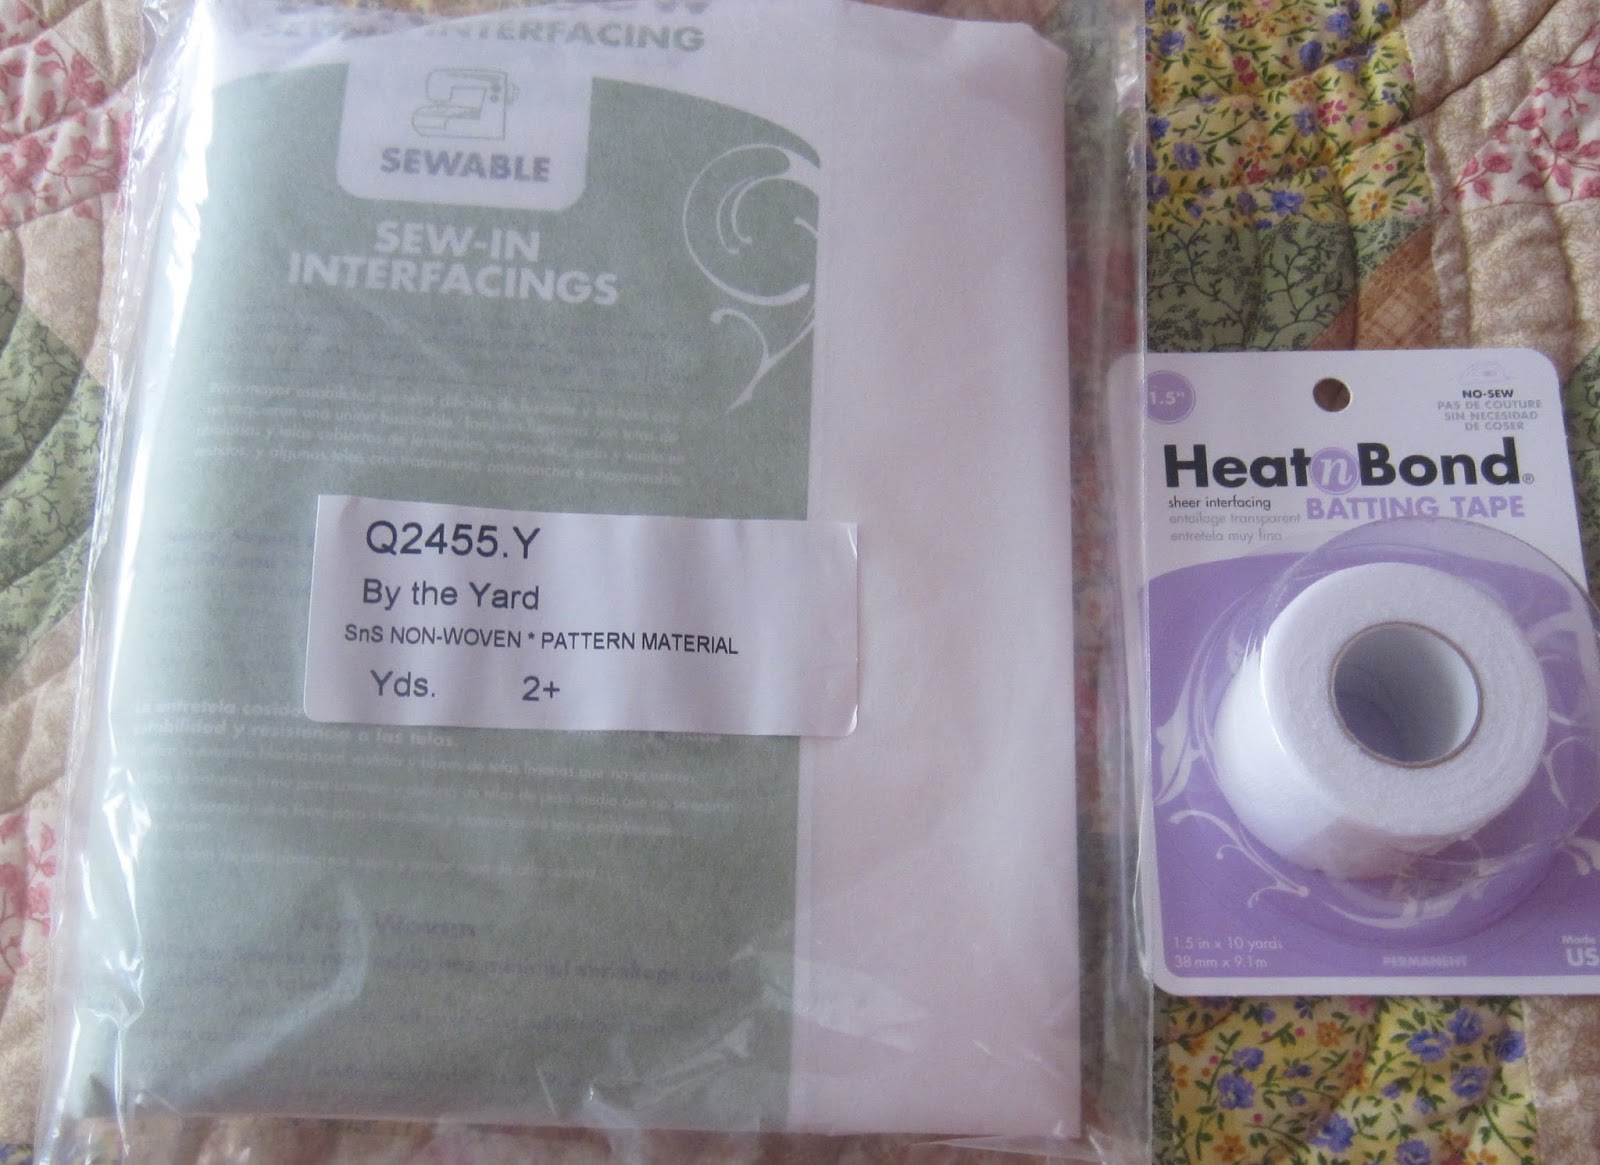
Sew in interfacing and batting tape.

 To be honest I have not heard of batting tape (or were my blinders on)....and it is for piecing your batting together for small or large quilts.  Great use of your batting scraps.  I won't tell you how I put my batting together....trust me it is more time consuming than using this tape.


Adhesive by the yard, this is lite.    I usually don't by fabric adhesive by the yard and I am asking myself, WHY NOT?  I saw a lady buying some the other day, is it cheaper?  You can buy it in the rolls as seen in this picture but never dawned on me to buy it by the yard.

I do remember using iron on vinyl in Samoa and had it shipped in but for the life of me can not figure out where I got it or what brand.  Oh well....my son lifts weights and needs a bag for his chalk....so I think this will work perfect (more on this later).


Then two brochures on the products themselves and what they can do.  This is so valuable to me because I NEVER KNEW!!!  And now I do....

So Thank you Julia in helping with my quest to find a fabric fusible that will do what I want it to.  As you can see here, there are many options....and many items that go beyond the fusibles.


Finished the octopus and I used Heat n Bond lite on it, except for the" G".  I used Steam A seam, it was easy to reverse the "G" that way.

Would any of you like to try the Heat N bond lite or heavy?  I will send one person a yard each and I just might throw in a half yard of vinyl....just leave a comment.

Wednesday, July 3, 2013

A New Runner - - -JUST IN TIME FOR THE 4TH!!!! FABRIC FUSIBLES CONTINUED

I went back to JoAnn's and purchased a lighter Heat n' Bond and then I saw this Pellon Wonder Under

I have to confess that I do like having fusible on a roll.

  I know that Steam A Seam has it on a roll  but I have had to order it. Having it on the roll makes for larger projects. Heat N Bond also has it on a roll at Walmart.


I used the Wonder Under on the Red streamers.....
1. easy application
2. didn't need steam
3. no gumming on the needle

I used the Heat N Bond on the hat and stars.
1. Easy application
2. didn't need steam
3. no gumming of needle

I did find that the Heat N Bond was a little heavier than the Wonder Under.

I actually liked using both products.

  Haven't decided which one I like better, that will come with more use.

  I did not have any issues with getting the paper to come off the back so that was nice.

 
Yes, I am probably a little late with this runner but I sure love it, you can find the pattern here:
 
 
I did order some Misty Fuse from Kelly at I Have a Notion and so look forward to trying this one out.
 
It is so nice to have so many options.  At one time I would panic if I did not have Steam A Seam but those days are gone.
 
If you want to see the comments from others about some of these products go here  I enjoyed the comments, very educational!